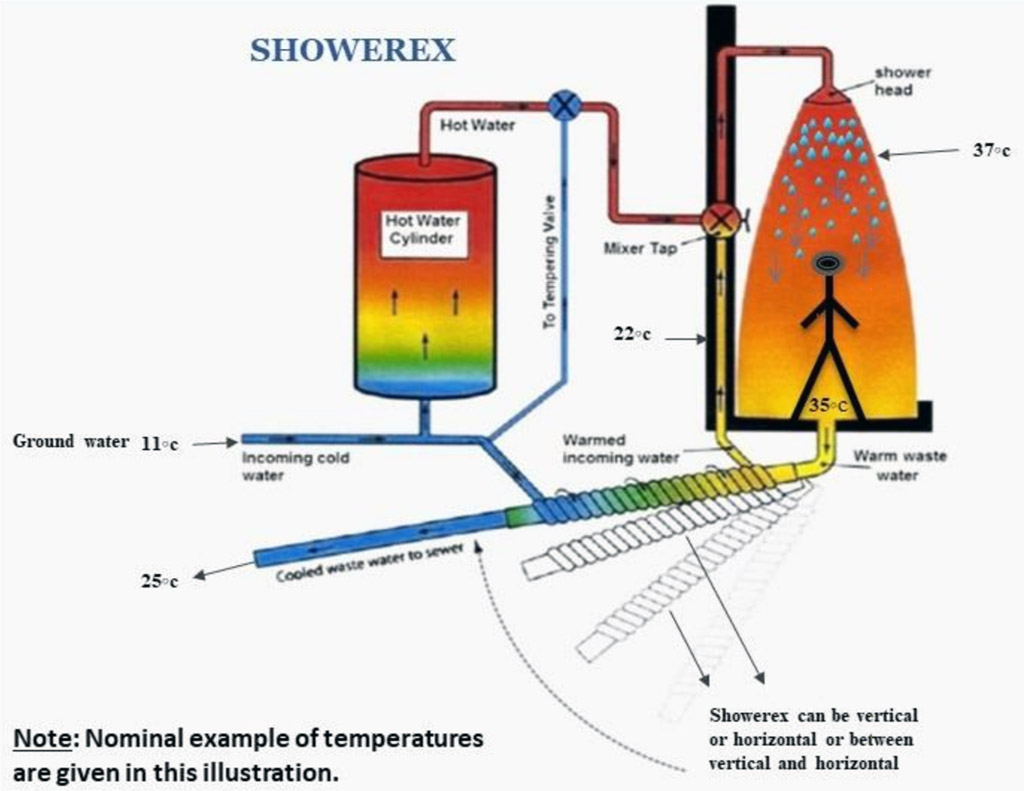
The Showerex Energy Saver is simply installed in a shower waste pipe and transfers the heat from the waste "grey" water to the incoming mains cold water.
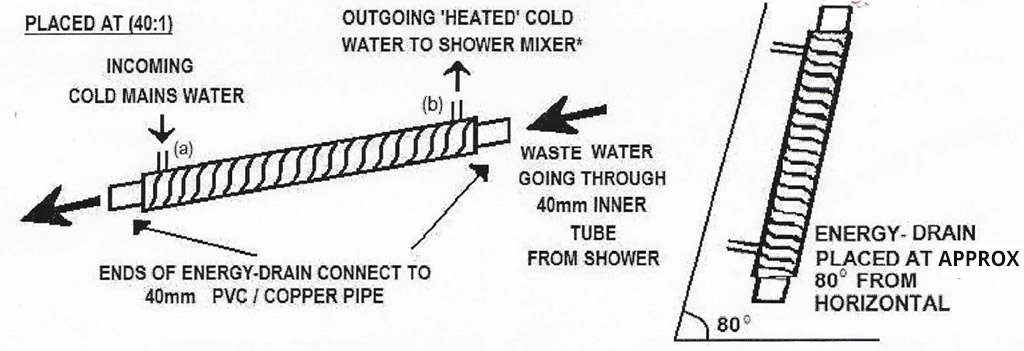
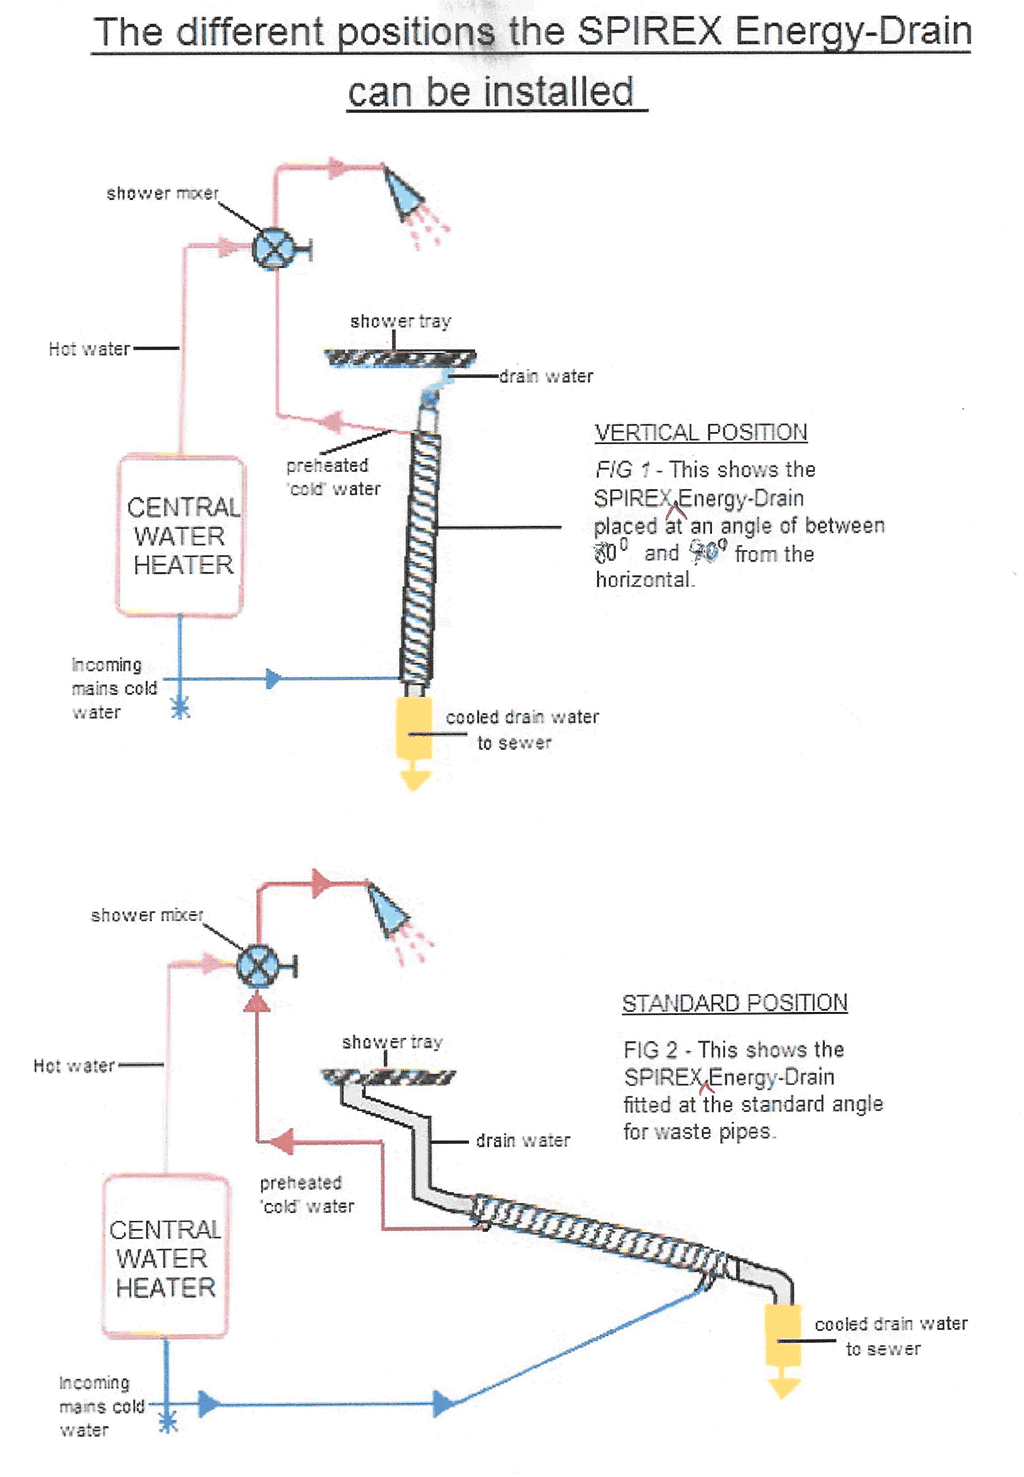
Installation is very simple. The ends fit most standard waste pipe fittings. Plumb "Counter Flow" the incoming mains cold supply to enter the bottom on the Showerex and the pre-heated water to the cold water supply of the shower mixer. Because the Showerex uses the patented Spirex formed tubing it is highly efficient and so can be placed at numerous angles from the standard plumbing positions (40:1) to a vertical position.
The diagram shows the Showerex Heat Recovery system installed and demonstrates the various angles it can be placed. This highlights it's versatility from "retro-fit" single story buildings to multi-story high rise buildings.
Note: Ensure that the cold mains feed water is counter-flow to the waste water.
Note:
The Showerex is most efficient when installed at 80 degrees from the horizontal. If this is not possible, then it must be placed in compliance to the standard plumbing code.
The Showerex has been designed to be used in conjunction with a tempering valve.
Ensure that the unit is supported correctly.
After installation all connections should be tested hydro-statically to 200 psi to comply with plumbing standards.
It is recommended that a drain cleaner is used at least every 6 months to maximise the efficiency of the Showerex.
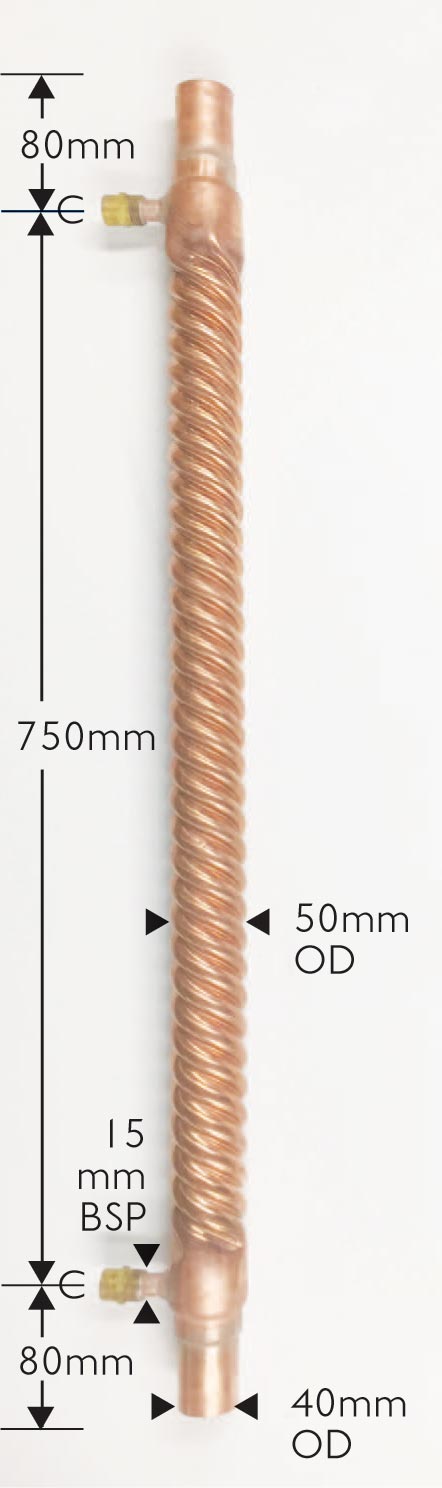
The outer diameter is 50mm and when fitted with 13mm insulation overall diameter is 76mm. Allow 80mm cavity clearance with insulation (recommended) and 60mm cavity clearance without insulation.


Vaportec NZ Limited © 2026